
How To Remove A Single Handle Kitchen Faucet
Introduction to Single Handle Kitchen Faucets
Single handle kitchen faucets are a common fixture in modern kitchens, prized for their sleek design and convenient functionality. These faucets feature a single lever or handle that controls both the flow and temperature of water, making them intuitive and easy to use. Understanding how to remove a single handle kitchen faucet is essential for homeowners and DIY enthusiasts, as it allows for maintenance, repair, or replacement as needed.
Preparing for Faucet Removal
Before attempting to remove a single handle kitchen faucet, it’s important to gather the necessary tools and materials. This may include adjustable wrenches, basin wrenches, screwdrivers, and plumber’s putty, among other items. Additionally, shutting off the water supply to the faucet is crucial to prevent leaks or water damage during the removal process. This involves locating the shut-off valves under the sink and turning off both the hot and cold water lines. Draining any excess water from the faucet by opening the handle will also make the removal process easier and less messy.
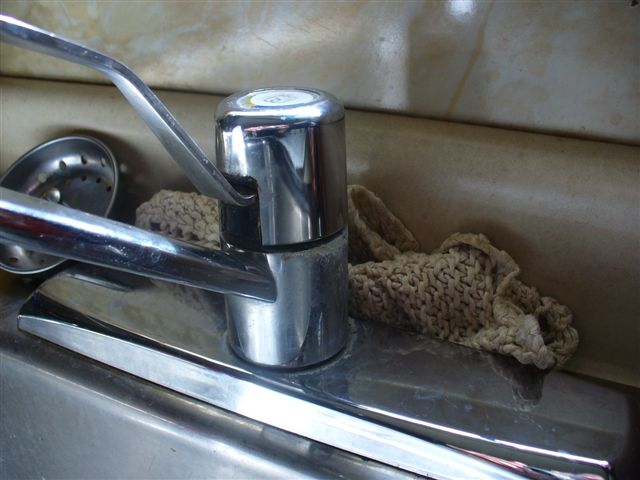
Removing the Faucet Handle
The first step in removing a single handle kitchen faucet is to access and remove the handle. This typically involves locating the set screw that secures the handle to the faucet body. The set screw is often concealed beneath a decorative cap or cover, which can be removed using a small screwdriver or similar tool. Once the set screw is exposed, it can be loosened and removed using an appropriate tool, such as an Allen wrench or screwdriver. With the set screw removed, the handle can be gently pulled or twisted to detach it from the faucet stem or cartridge.
Detaching the Faucet Base
After removing the handle, the next step is to detach the faucet base from the sink or countertop. This typically involves loosening and removing the mounting nut that secures the faucet in place. A basin wrench or adjustable wrench may be needed to reach and loosen the mounting nut, which is often located beneath the sink. Once the mounting nut is removed, the water supply lines can be disconnected from the faucet connections. Care should be taken to avoid damaging or leaking the water supply lines during this process. With the mounting nut and water supply lines removed, the faucet base can be lifted from the sink deck or countertop, allowing for removal.
Final Steps and Considerations
After removing the single handle kitchen faucet, it’s important to clean and inspect the faucet and sink area before installing a new faucet or completing any necessary repairs. This may involve removing any debris or buildup from the faucet and sink surface to ensure a clean and smooth installation. Additionally, it’s important to assess the need for repairs or replacement parts before proceeding. Examining the faucet components for wear, damage, or signs of malfunction can help determine the best course of action. Whether installing a new faucet or making repairs, it’s essential to follow manufacturer instructions and best practices to ensure a successful outcome.